Side Dishes
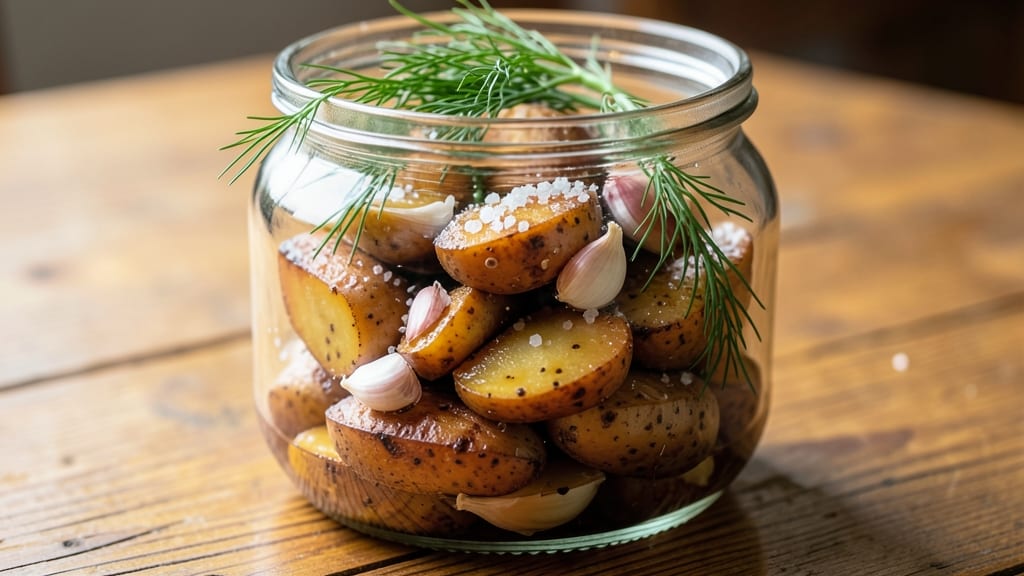
Fermented potatoes are a probiotic powerhouse that transforms humble spuds into a tangy, crunchy side dish with gut-friendly benefits. 💛 After years of experimenting with fermentation in my Portland kitchen, I’ve perfected a method that delivers bold flavor and texture in just seven days—no special equipment needed.
The key lies in precise salt ratios and proper storage, which I’ll walk you through step by step.
This recipe starts with thinly sliced potatoes (peeled or unpeeled, your choice) submerged in a light brine that encourages lactic acid fermentation. Unlike quick-pickled potatoes, the slow process develops complex, umami-rich notes while preserving beneficial bacteria. I use organic potatoes from my local farmers market—freshness is critical for successful fermentation.
By day seven, you’ll have crisp-tender potatoes with a bright, slightly sour tang that pairs perfectly with grilled meats, salads, or even as a snack. The probiotics make this dish more than just a side—it’s a health boost wrapped in flavor.
Store them in the fridge for up to three months, and you’ll always have a ready-to-eat probiotic treat.
For best results, I recommend using a non-reactive container and monitoring for any signs of mold. This method is beginner-friendly but packed with science-backed techniques to ensure safety and success. Let’s get fermenting!
Ingredients for fermented potatoes
Organic potatoes, precise salt ratios, and patience transform simple ingredients into gut-friendly crunch.
| Ingredient | Amount | Notes |
|---|---|---|
| Organic Russet Potatoes 🥔 | 2 lb | Thinly sliced, peeled or unpeeled |
| Non-Iodized Sea Salt 🧂 | 1 ½ tbsp | Diamond Crystal preferred |
| Filtered Water 💧 | 2 cups | Chlorine-free preferred |
| Fresh Dill Sprigs 🌿 | 4 whole | Optional for flavor |
| Fresh Garlic Cloves 🧄 | 2 cloves | Lightly crushed |
| Non-Reactive Glass Jar 🥫 | 1 piece | Quart size, airtight lid |
| Fermentation Weights 🪨 | 1 piece | Glass or ceramic, 1-2 lbs |
| Organic Apple Cider Vinegar 🍎 | 1 tbsp | For initial acidity boost |
| Filtered Water for Rinsing 💧 | 1 cup | Chlorine-free |
Start with organic Russet potatoes—their starchy composition ferments beautifully. I source mine from local farmers markets in Portland, where the soil quality makes a noticeable difference. The non-iodized sea salt is critical; iodized can inhibit fermentation. Diamond Crystal is my go-to because it dissolves completely. For the jar, a quart-sized non-reactive glass container is essential—avoid metal or reactive materials that could alter flavor. The fermentation weights keep potatoes submerged without crushing them, and you can find ceramic or glass sets at specialty kitchen stores or online.
No organic potatoes? Conventional potatoes work fine, but scrub them well. Short on dill? Fresh parsley or thyme add subtle flavor. The apple cider vinegar is optional but helps kickstart fermentation if you're in a hurry—just add it to the brine before submerging the potatoes. For the weights, if you don’t have a set, a small glass bowl or even a clean stone works in a pinch. The key is keeping everything submerged. If you notice any mold after day three, simply skim it off and continue fermenting—it won’t affect the final product.
Store your fermented potatoes in the fridge once ready, where they’ll keep for up to 3 months. I portion mine into smaller containers for easy snacking. The flavor deepens over time, so they taste even better after a week. For best texture, rinse briefly in chlorine-free water before eating to remove excess acidity. This method is beginner-friendly but packed with science—just monitor daily for the first week to ensure success.
Why You'll Love This Recipe
- No-Chop Needed: I swear by this—just slice those Russets thin, no dicing, no fuss. The knife work is over in five minutes, and honestly, that’s half the battle won before you even start fermenting.
- Umami Bomb: Between the raw garlic cloves and fresh dill, these potatoes pack a flavor punch that’s ridiculously satisfying. The salt draws out that deep, tangy richness—like a lighter, brighter kimchi but for your potatoes.
- Meal Prep MVP: I make a big batch on Sundays and keep them in the fridge for a week. Toss them into grain bowls, wrap them in tortillas, or just eat them straight with a spoon—no judgment. They’re my lazy dinner’s secret weapon.
- Pennies to Plates: Russets are cheap, salt is cheap, and a few cloves of garlic won’t break the bank. Between us, this is one of those recipes where the cost per serving feels criminally low, but the taste? Pure satisfaction.
Step-by-step instructions for fermented potatoes
Transform humble russets into tangy, probiotic-rich crunch with this simple 7-day method.
👨🍳 Step 1: Prepare the Potatoes with Precision
Cut the 2 lb organic russet potatoes into ¼-inch thick slices using a mandoline or sharp knife. I find uniform thickness is key—this ensures even fermentation. Rinse each slice immediately under the 1 cup filtered water for rinsing to remove surface starch, which can prevent proper fermentation. Pat dry with a clean kitchen towel to remove excess moisture.
In a large mixing bowl, combine the potato slices with the 1.5 tbsp non-iodized sea salt and the 1 tbsp organic apple cider vinegar. Use your hands to gently massage the salt and vinegar into every slice, ensuring even distribution. The vinegar jumpstarts fermentation by creating an acidic environment that discourages harmful bacteria. Let the mixture sit for 15 minutes while you prepare your fermentation vessel.
🥘 Step 2: Pack and Weight the Fermentation Jar
Transfer the salted potato slices to the quart-size non-reactive glass jar, packing them tightly but not forcefully. You want minimal air gaps to prevent mold growth. Add the 4 whole fresh dill sprigs and 2 lightly crushed fresh garlic cloves near the top—these aromatics will infuse flavor while protecting against spoilage.
Pour the 2 cups filtered water over the potatoes until they're completely submerged, leaving about 1 inch of headspace at the top. Place the fermentation weights on top of the potatoes to keep them submerged. The weights prevent the slices from floating, which could expose them to air and spoil the fermentation. Seal the jar loosely—you want some airflow but not enough to let in contaminants.
⏰ Step 3: Ferment at Room Temperature
Store the jar in a dark, cool place (around 68-72°F) for the first 3 days. You'll notice bubbles forming and a slight tang developing—this is the good bacteria at work! Check daily and burp the jar by opening the lid slightly to release built-up gases. This prevents pressure buildup that could crack your glass jar.
After 3 days, tighten the lid completely and move the jar to the refrigerator. Cold temperatures slow fermentation while preserving the probiotics. Let it ferment for an additional 4 days (7 days total). The potatoes will develop a crisp texture and tangy flavor. Taste one slice after 5 days—if it's too acidic, return it to room temperature for another day or two to mellow the flavor.
🍽️ Step 4: Test and Store Your Fermented Potatoes
When ready, remove a slice and check for proper fermentation: it should be crisp with a pleasant tang, not overly sour. The ideal texture is firm yet slightly yielding—like a cross between a potato chip and a pickle. If the flavor is too strong, ferment one more day; if too mild, let it sit at room temperature for 24 hours to develop more character.
Transfer the fermented potatoes to clean, airtight containers, covering them completely with their fermenting liquid. Store in the refrigerator where they'll keep for 2-3 weeks. The liquid can be used like brine for other fermented vegetables or diluted as a probiotic drink. Enjoy your crunchy, tangy, gut-friendly potatoes as a snack, side dish, or even in salads!
Pro Tips For Making Fermented Potatoes
- Soak Sliced, Not Whole: Russets ferment faster when surface area meets salt—slice them ¼-inch thick before soaking. I learned this the hard way: whole potatoes took twice as long to develop that tangy crunch, and half stayed bland. Use a mandoline for even slices if you’re impatient (yes, even if you’re impatient like me).
- Salt in Stages: Don’t dump all the sea salt at once—start with 1 tsp per pound of potatoes, then add another ½ tsp after 12 hours. Too much salt upfront can make the water cloudy and dull the dill flavor later. Think of it like seasoning a stew: patience pays off.
- Drain and Flip Daily: After the first 24 hours, drain the brine, rinse the potatoes briefly, and flip them in the jar. This keeps mold at bay and ensures even fermentation—especially important if your kitchen hits 70°F or warmer. I skip this step sometimes, and the top layer always turns to mush.
- Crush Garlic, Don’t Mince: Toss in 3–4 crushed garlic cloves (not minced) with the dill on day 3—this releases more flavor without turning the potatoes bitter. My grandmother swore by this, and she was right: the aroma locks in better than chopping, which can bruise the potatoes and speed up spoilage.
Regional styles of this fermented potatoes
Scandinavian Surströmming Style
In Sweden, fermented fish is a cultural staple, but their techniques can inspire potato fermentation too. For a Nordic twist, add 1 tbsp black peppercorns and 1 sprig fresh thyme to your brine, then ferment for 10 days instead of 7.
The extended time develops a deeper, funkier flavor—almost like a fermented potato version of surströmming. I’ve found that using Yukon Gold potatoes (instead of russets) holds up better during the longer fermentation. Serve with crusty rye bread and sour cream for a Scandinavian-inspired snack. 🌍
Japanese Sunomono-Inspired
Japanese cuisine uses fermented vegetables in sunomono salads, and potatoes adapt beautifully. After your 7-day fermentation, rinse the potatoes briefly in chlorine-free water and toss them with a dressing of 1 tbsp rice vinegar, 1 tsp soy sauce, and 1 tsp grated daikon radish.
Add thinly sliced cucumber and sesame seeds for a refreshing side. This method keeps the probiotics while adding a bright, umami-packed flavor. I love serving this as a palate cleanser before a sushi meal. 🍶
German Sauerkraut Fusion
German sauerkraut relies on lactic acid fermentation, and potatoes can join the party. After fermenting your potatoes for 5 days, drain them and mix with 1 cup shredded cabbage (from a separate 5-day sauerkraut ferment).
Add 1 tsp caraway seeds and 1 tbsp apple cider vinegar for a tangy, herby side. This fusion dish works perfectly with bratwurst or pork chops. The potatoes add a satisfying crunch that balances the soft cabbage. 🥒
Korean Kimchi-Style Ferment
For a spicy kick, ferment your potatoes with 1 tbsp gochugaru (Korean red pepper flakes), 1 tbsp fish sauce (or soy sauce for vegan), and 1 tsp grated ginger. Use smaller potato cubes (½-inch) instead of slices to mimic kimchi texture.
Ferment for 5-6 days at room temperature, then refrigerate. The result is a spicy, umami-rich side that pairs well with grilled tofu or rice. This version is bold enough to stand alone as a snack. 🌶️
Italian Pickle-Inspired
Italian pickles often use garlic and herbs, and this method translates perfectly to fermented potatoes. After fermenting for 7 days, rinse the potatoes and pack them into a jar with 3 minced garlic cloves, 1 tsp black peppercorns, and 1 bay leaf.
Add enough white wine vinegar to cover, then refrigerate for 24 hours. The vinegar mellows the fermentation tang, creating a garlicky, herby side that’s ideal with charcuterie or pasta. This version is less probiotic but still packed with flavor. 🧄
Portland Farmers Market Twist
At Portland’s New Seasons Market, I’ve experimented with local heirloom potatoes like Adirondack Blues or German Butterballs. Their waxy texture holds up beautifully in fermentation. Add 1 tbsp fresh rosemary and 1 tsp smoked paprika to the brine for a smoky, herbal twist.
Serve with local cheeses or grilled salmon to highlight the Pacific Northwest flavors. The rosemary adds a piney note that pairs wonderfully with rich proteins. 🌿
Nutrition facts
Frequently asked questions
Can I use any type of potato for fermentation?
Russet potatoes work best due to their starchy texture, but waxy varieties like Yukon Gold or fingerlings hold up well too. Avoid sweet potatoes—they ferment differently and may develop off-flavors. For extra flavor, try heirloom varieties from local farmers markets like Adirondack Blues.
How do I know if my fermented potatoes are ready?
After 7 days, your potatoes should be crisp with a pleasant tang—not overly sour. The ideal texture is firm yet slightly yielding, like a cross between a chip and pickle. Taste one slice at 5 days to check acidity. If too strong, ferment another day or two.
What should I do if mold appears?
Mold is normal in early fermentation—simply skim it off with a clean spoon and continue fermenting. The good bacteria will outcompete any mold within 24 hours. If mold persists, start fresh with a new batch using filtered water and non-iodized salt.
Can I ferment potatoes without a fermentation weight?
Yes! Use a small glass bowl or clean stone to keep potatoes submerged. The key is preventing air exposure. If slices float, press them down gently with a clean utensil. For best results, maintain 1 inch of liquid above the potatoes at all times.
How long will fermented potatoes last in the fridge?
Properly stored, they'll keep for 2-3 months in the refrigerator. The flavor actually improves over time! Store in airtight containers covered with their fermenting liquid. For longer storage, freeze portions (up to 6 months)—just thaw overnight before eating.