Desserts
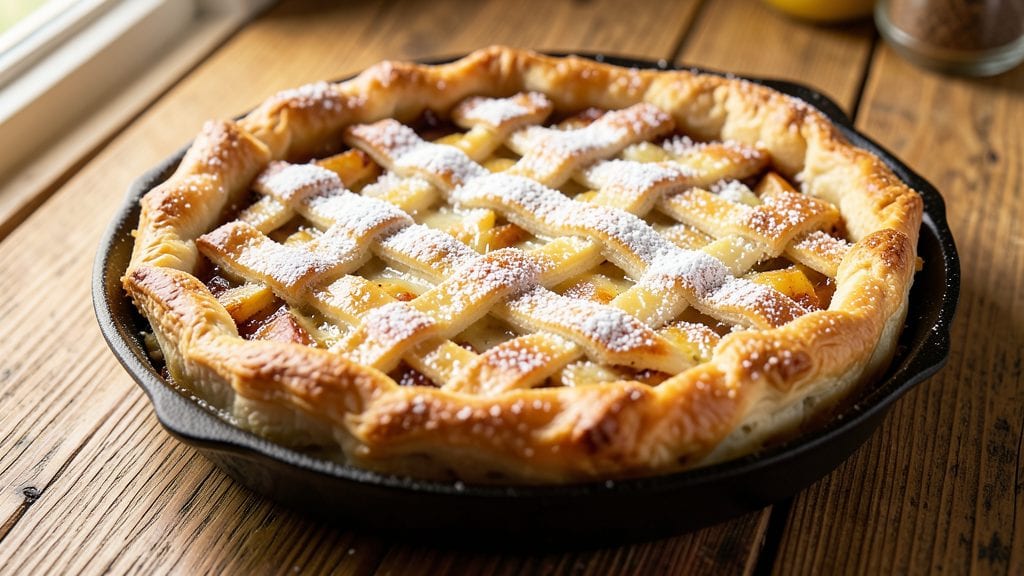
Grandma's old-fashioned potato pie recipe is the kind of dessert that brings back memories of Sunday dinners and family gatherings—warm, comforting, and impossible to resist.
The secret lies in a simple yet sturdy crust that gives way to a creamy, velvety potato filling infused with just enough nutmeg and cinnamon to evoke nostalgia.
I first learned this recipe from my grandmother, who swore by her foolproof method of boiling potatoes until they were tender yet still held their shape, ensuring that each bite delivered that perfect balance of texture and flavor.
What makes this recipe truly special is how it combines rustic charm with professional results—no fancy techniques required. The crust, made with just flour, butter, and a touch of salt, creates a golden, flaky base that contrasts beautifully with the smooth filling.
The filling itself is where the magic happens: creamy mashed potatoes blended with eggs, milk, and a pinch of seasoning, then baked until set but still silky.
This is the kind of dessert that feels like a hug in pie form, and it’s exactly what you’ll recreate in your own kitchen.
By the time you pull this pie from the oven, your home will be filled with the irresistible aroma of warm spices and buttery crust, signaling that dessert is ready.
The crust will be golden and crisp around the edges, while the filling remains soft and velvety, with just a hint of caramelization on top. It’s the kind of pie that disappears quickly, leaving everyone asking for seconds—and that’s exactly the reaction you want.
Whether you’re serving it at a holiday gathering or simply treating yourself to a slice of comfort, this recipe delivers every time.
One of the best things about this potato pie is its versatility—it’s just as perfect for a cozy weeknight dessert as it is for a festive occasion. You can even make it ahead and refrigerate it, letting the flavors deepen overnight.
The key is patience, as the pie tastes even better the next day, when the filling has had time to settle and the crust has cooled just enough to be enjoyed without burning your fingers.
Let’s get started on creating a slice of nostalgia that’s as delicious as it is memorable.
Ingredients for grandma's old fashioned potato pie
Just twelve ingredients for a pie that tastes like grandma's kitchen—warm, comforting, and full of nostalgia.
| Ingredient | Amount | Notes |
|---|---|---|
| Russet Potatoes 🥔 | 3 lbs | Medium size, peeled and cubed |
| Unsalted Butter 🧈 | 1 ½ cups | Cold, cubed for crust |
| All-Purpose Flour 🌾 | 2 cups | Plus 2 tbsp for crust |
| Large Eggs 🥚 | 2 whole | Room temperature for filling |
| Whole Milk 🥛 | 1 ½ cups | Full-fat for creaminess |
| Granulated Sugar 🍚 | ½ cup | Lightly browned for flavor |
| Ground Nutmeg 🌿 | ½ tsp | Freshly grated preferred |
| Ground Cinnamon 🌶️ | 1 tsp | Warm, aromatic variety |
| Salt 🧂 | 1 ½ tsp | Kosher or sea salt |
| Vanilla Extract 🌸 | 1 tsp | Pure alcohol-free if preferred |
| Ice Water ❄️ | ¼ cup | For crust consistency |
The potatoes are the heart of this pie. Russets are your best bet—they’re starchy enough to hold their shape when boiled and mash into that perfect velvety texture. Buy them fresh (the greener the skin, the newer they are) and avoid those with sprouts. I always grab mine from Whole Foods or the local farm stand if they’re in season. For the crust, cold butter is non-negotiable—it creates those flaky layers that make this pie feel so special. If your butter’s been sitting out, pop it in the freezer for 15 minutes to firm up. The flour? King Arthur or Gold Medal are my go-tos—they’ve got that consistent protein level for a reliable crust.
No russet potatoes? Yukon Golds work in a pinch, but they’ll be a touch waxier. Short on butter? Lard or shortening keeps the crust flaky (yes, really!). The milk can be swapped for half-and-half or heavy cream, but you’ll lose some of that classic creaminess. Skip the vanilla? A splash of bourbon or rum adds depth—grandma’s secret, apparently. For the spices, freshly grated nutmeg. If you’re in a bind, toast your whole nutmeg seeds in a dry pan for 30 seconds to release the flavor, then grind them. The sugar? Lightly browning it in the pan (just until it smells caramel-y) gives that deep, buttery flavor grandma’s filling had.
This pie tastes even better the next day—make it ahead if you can. Store it in the fridge for up to 5 days, and if you’re really planning ahead, it freezes beautifully for 3 months. Just thaw it overnight in the fridge before reheating. The crust stays crisp if you reheat it covered with foil for 10 minutes at 350°F, then uncover for the last 5 to get that golden finish. Leftovers? Slice and freeze individual portions—perfect for quick dessert nights. And trust me, there will be leftovers.
Why You'll Love This Recipe
- No-Fuss Mash: I swear by this recipe because it skips the fuss of boiling and peeling—just slice those Russets, bake ‘em until tender, then smash ‘em with butter and milk. The kids can help (and won’t complain about the mess).
- Creamy Gold Standard: That buttery, eggy custard on top? It’s the real MVP—rich but not heavy, with a texture so smooth you’ll forget it’s basically mashed potatoes in disguise. Honestly, I’ve tried store-bought pies, and none hit this.
- Leftovers Win: This pie reheats like a dream—microwave or oven, no soggy edges in sight. I make a double batch on Sundays, and by Wednesday, I’m still scraping the last bits off the pan. (Yes, even on a Tuesday night.)
- Budget Magic: Russets and milk? Check. Flour and eggs? Already in my pantry. This recipe costs me pennies per serving but tastes like a holiday feast. Between us, it’s my go-to for potlucks where I don’t want to bring something fancy.
Step-by-step instructions for Grandma's old fashioned potato pie
This classic recipe brings comfort in every bite—creamy mashed centers and a flaky crust that'll have you licking your fingers.
Prepare the Potato Filling for Maximum Creaminess
First, boil the 3 lbs Russet Potatoes in salted water until they're fork-tender, about 15-20 minutes. Drain them completely and return to the pot. Add 1 cup of the 1.5 cups unsalted butter and mash until smooth, scraping the bottom of the pot to incorporate all the starch. You want this mixture silky, not lumpy.
Next, whisk in the 2 whole Large Eggs, 1.5 cups Whole Milk, 0.5 cup Granulated Sugar, 0.5 tsp Ground Nutmeg, 1 tsp Ground Cinnamon, 1 tsp Vanilla Extract, and 1 tsp Salt. The filling should be thick but still pourable—like a luxurious pudding. If it's too stiff, add 1-2 tablespoons of the reserved milk to loosen it. Taste and adjust seasoning; Grandma's version always had just a hint of sweetness balanced by warm spices.
Create the Perfect Rustic Crust
In a large bowl, cut the remaining 0.5 cup unsalted butter into small cubes and mix with the 2 cups All-Purpose Flour and 1.5 tsp Salt using a pastry cutter or your fingers until the mixture resembles coarse crumbs with pea-sized butter pieces. Gradually add the 0.25 cup Ice Water, one tablespoon at a time, mixing gently until the dough just comes together.
Turn the dough onto a lightly floured surface and knead it 3-4 times—just enough to bring it together without overworking. Roll it out to about 1/8-inch thickness on a parchment-lined baking sheet. Poke the dough all over with a fork to prevent puffing. This crust should be rustic, not perfect—Grandma always said imperfections made it taste better!
Assemble the Pie for Golden Perfection
Preheat your oven to 375°F. Spread the potato filling evenly over the crust, leaving a 1/2-inch border around the edges. This ensures the crust stays crispy instead of soggy. Fold the edges of the crust up and over the filling, pinching them together to create a decorative border. Brush the crust with the remaining 2 tablespoons milk for extra richness.
Bake Until Bubbly and Golden
Bake the pie for 45-50 minutes until the crust is deep golden brown and the filling is gently bubbling in the center. The edges should be crisp, while the top remains slightly soft—this is how Grandma made it. If the crust browns too quickly, tent it loosely with foil after 30 minutes to prevent burning.
Let the pie rest for 15 minutes before serving—this allows the filling to set slightly and makes slicing easier. The center should be warm and creamy, with a caramelized crust that shatters at every bite. Serve with a dollop of whipped cream if you're feeling fancy, though Grandma always said it was perfect just as is!
Pro Tips For Making Grandma'S Old Fashioned Potato Pie
- Boil Potatoes Until Tender: Russets need to be actually soft—no resistance when pierced with a fork. I learned this the hard way after serving a pie with slightly firm chunks that felt like chewing on regret. Drain them well, then let them cool completely before mashing, or your butter will just melt into a sad puddle.
- Whisk Eggs Like a Mad Scientist: Beat the eggs until they’re pale and thick enough to leave a trail when you lift the whisk. This isn’t the time to be lazy—under-mixed eggs make the pie gummy, and nobody wants that. If your arms get tired, switch to a hand mixer, but don’t skip this step.
- Skip the Overmixing: Once you fold in the flour, stop stirring the second everything looks combined. Overworking the batter makes the pie dense and tough—like eating a brick with a little milk glaze. Think "just enough to coat," not "homemade Play-Doh."
- Bake at 350°F—No Higher: Higher heat = faster baking, but also a crust that’s golden on top and raw underneath. Grandma’s recipe counts on that 350°F oven to cook through evenly. If you’re impatient, tent it with foil halfway, but don’t rush it—this isn’t a race.
Serving suggestions for this recipe
Classic Whipped Cream
Grandma’s potato pie deserves a classic topping—homemade whipped cream with a touch of vanilla. Whip 1 cup heavy cream with 1 tablespoon powdered sugar and ½ teaspoon vanilla extract until soft peaks form.
Fold in 1 tablespoon browned butter for extra richness. Spoon dollops over each slice for that nostalgic touch. 🥛
Caramel Drizzle
For a decadent upgrade, drizzle warm slices with homemade caramel sauce. Simmer ½ cup granulated sugar with ¼ cup heavy cream and 2 tablespoons butter until golden.
Let cool slightly before drizzling—it’ll melt beautifully over the creamy filling. Store-bought caramel works in a pinch, but homemade tastes like love. 🍯
Spiced Whipped Cream
Add warmth with spiced whipped cream: whip 1 cup heavy cream with 1 tablespoon powdered sugar, ½ teaspoon cinnamon, and a pinch of nutmeg.
For extra flair, fold in 1 tablespoon toasted pecans or walnuts. This pairs perfectly with the pie’s cozy spices and adds crunch. 🌶️
Fresh Fruit Pairings
Balance the richness with tart fruit. A few slices of cold apple or pears cut through the creaminess, while raspberries add a bright pop of color. I love arranging fruit in a small bowl alongside the pie for a rustic dessert platter. 🍎
Coffee or Tea Service
Serve slices warm with a cup of black coffee or Earl Grey tea to complement the pie’s buttery, spiced flavors. The tannins in tea enhance the nutmeg, while coffee’s bitterness balances the sweetness. Grandma always said coffee made everything better—and she was right. ☕
Make-Ahead Serving
This pie tastes even better the next day, so prepare it ahead for gatherings. Store leftovers in an airtight container and reheat slices at 350°F for 10 minutes before serving. Garnish with a sprinkle of ground cinnamon or a drizzle of honey for a fresh-from-the-oven look. 💫
Nutrition facts
Frequently asked questions
Can I use sweet potatoes instead of russets for this potato pie?
While you can substitute sweet potatoes, the texture and flavor will differ significantly. Sweet potatoes are naturally sweeter and moister, which may alter the pie's balance. If you try it, reduce the sugar in the filling by ¼ cup and add ½ teaspoon extra cinnamon to complement their natural sweetness. For best results, stick with russets—they create that classic, velvety texture Grandma's recipe relies on.
Why does my crust turn out soggy instead of crisp?
Soggy crusts usually happen when the filling is too wet or the crust isn't pre-baked. First, ensure your filling isn't too runny—it should be thick but pourable. Second, always leave a ½-inch border of crust uncovered by filling. For extra insurance, blind-bake the crust for 5 minutes at 375°F before adding the filling. This creates a barrier between the crust and filling.
Can I make this pie ahead of time?
This pie actually tastes better the next day. Assemble it completely, then refrigerate for up to 24 hours before baking. For longer storage, bake the pie, then refrigerate in an airtight container for up to 5 days. Reheat slices at 350°F for 10 minutes to restore that warm, comforting texture.
What's the secret to getting that perfect golden crust?
The golden color comes from a combination of factors: using cold butter in the crust, brushing it with milk before baking, and baking at 375°F. For extra color, sprinkle the crust with a little granulated sugar before baking. Also, rotate the pie halfway through baking to ensure even browning. If it browns too quickly, tent it loosely with foil after 30 minutes.
Can I freeze individual slices of this pie?
Yes, you can freeze slices for quick dessert nights! Wrap each slice tightly in plastic wrap, then place in a freezer bag. Frozen slices will keep for up to 3 months. To serve, thaw in the refrigerator overnight, then reheat at 350°F for 8-10 minutes until warmed through. The texture will be slightly denser after freezing, but still delicious.